Doom Fire in LÖVE/lua
This weekend I read Fabien Sanglard’s post describing how the fire effect was implemented in Doom on the Playstation 1 and I figured this was a good chance to implement a small toy program in LÖVE.
Here’s an iterative tutorial, written for beginners, to demonstrate implementing this effect using Lua in the LÖVE environment. If you’re already experienced with Lua or programming in general then go read Fabien’s post. It’s much more succinct.
LÖVE program layout#
In LÖVE, a program consists of one or more .lua files in a folder. The most
important file is main.lua and it needs to contain the following three
functions:
function love.load()
end

function love.draw()
end

function love.update(dt)
end
Make a folder with a file named main.lua with the above three functions, then
open that folder in LÖVE and you’ll see… nothing. Well, not nothing. You’ll
see a black window, which means you’ve successfully run a game that does
nothing.
Drawing a pixel grid#
LÖVE is optimized for modern hardware and a simpler development experience, so it operates mostly on objects and images instead of a raw pixel frame buffer. This is usually great, but we just want to set pixels to specific colors. So let’s start out by rendering a grid of rectangular “pixels”.
First off, we need to define a few constant numbers to use in a few places. Two
of these will be named WIDTH and HEIGHT to represent the number of pixels to
draw, and two more will be named PWIDTH and PHEIGHT to represent the size of
each of our fake pixels.
Global variables#
Define these constants at the top of main.lua:
WIDTH = 100
HEIGHT = 100
PWIDTH = love.graphics.getWidth() / WIDTH
PHEIGHT = love.graphics.getHeight() / HEIGHT
We need one more global variable, but this one is something that will be
modified a few times. Add an empty table named pixels under the constants.
pixels = {}
Generating color data#
Let’s fill out this table with some random colors to start. Do this in the
love.load() function. This function will be run once when our game is started,
so it’s good for loading or generating data.
function love.load()
    for y = 1, HEIGHT do
        pixels[y] = {}
        for x = 1, WIDTH do
            pixels[y][x] = {love.math.random(),love.math.random(),love.math.random()}
        end
    end
end
From the top, this function runs a for loop from 1 to the height of our window
in our fake pixels. It adds a new sub-table for each of these horizontal lines
and then runs an inner for loop from 1 to the width of our window in our fake
pixels. At this point, it can add one more sub-table representing the
red/green/blue
values of a
random color for that pixel.
Drawing pixels#
Finally, we can draw the pixels generated in the above loop. Fill out the
love.draw() function, which is run on every frame and describes how to draw
that frame.
function love.draw()
    for y = 1, HEIGHT do
        for x = 1, WIDTH do
            color = pixels[y][x]
            love.graphics.setColor(color[1], color[2], color[3], 1)
            love.graphics.rectangle('fill', (x-1) * PWIDTH, (y-1) * PHEIGHT, PWIDTH, PHEIGHT)
        end
    end
end
This function has the same nested for loops to loop over every pixel. The code
then sets the current RGB color to the color in the pixels table at these
coordinates. We get the red, green, and blue values out by indexing into the
color at indices 1, 2, and 3. This might look strange if you’re used to other
programming languages that start array offsets at index 0. Lua starts with index
1.
After setting the current drawing color, the code draws a pixel, or rather, a
rectangle that is used to represent a fake pixel. The code gets the real
coordinates on the window by multiplying the x,y coordinates by the pixel size
(after first subtracting 1 to get back to a 0-based index). Then it draws a
rectangle of size PWIDTH * PHEIGHT.
It’s important to note that the x,y coordinates of the window start at (0,0) in the top left and extend downward and to the right. This is different from graph coordinates in math, but is typical in graphics programming.
Result#
Complete code
WIDTH = 100
HEIGHT = 100
PWIDTH = love.graphics.getWidth() / WIDTH
PHEIGHT = love.graphics.getHeight() / HEIGHT
pixels = {}

function love.load()
    for y = 1, HEIGHT do
        pixels[y] = {}
        for x = 1, WIDTH do
            pixels[y][x] = {love.math.random(),love.math.random(),love.math.random()}
        end
    end
end

function love.draw()
    for y = 1, HEIGHT do
        for x = 1, WIDTH do
            color = pixels[y][x]
            love.graphics.setColor(color[1], color[2], color[3], 1)
            love.graphics.rectangle('fill', (x-1) * PWIDTH, (y-1) * PHEIGHT, PWIDTH, PHEIGHT)
        end
    end
end

function love.update(dt)
end
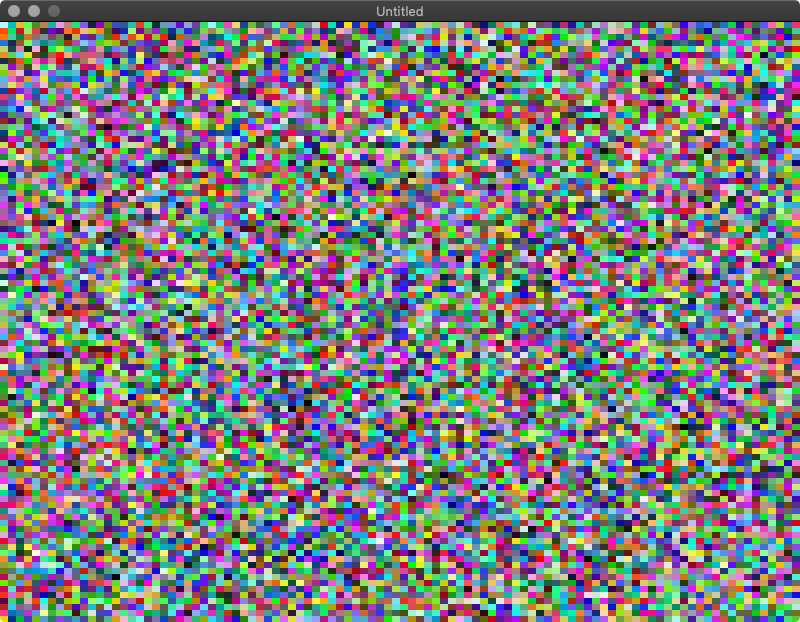
We don’t need to fill out love.update() yet, because the program isn’t going
to change the pixels right now. Open your folder in LÖVE to run it and check out
the crazy pattern.
Color palette#
Random colors look interesting, but we need to use a palette for the fire effect. A palette is a set of colors that our program will choose from for each pixel.
Palette table#
Up at the top of main.lua, add the palette table. Each of these entries is a
sub-table of red, green, and blue values from 0-255. These colors range from
black at the start, through a range of reds, and finally white at the end.
palette = {
    {7,7,7},
    {28,8,8},
    {43,17,9},
    {65,19,11},
    {80,28,13},
    {95,36,16},
    {110,38,18},
    {133,47,22},
    {148,55,25},
    {163,70,30},
    {178,79,33},
    {185,80,34},
    {208,89,39},
    {208,96,40},
    {208,96,40},
    {201,102,41},
    {202,109,45},
    {195,115,45},
    {196,123,47},
    {197,130,49},
    {198,138,53},
    {190,137,53},
    {191,145,54},
    {192,152,60},
    {186,160,61},
    {186,160,61},
    {187,167,67},
    {187,167,67},
    {189,175,73},
    {182,175,72},
    {183,182,74},
    {183,182,79},
    {207,206,124},
    {223,223,166},
    {239,239,203},
    {255,255,255}
}
Switching pixels to palette values#
Let’s make some changes to how pixels are stored so that the code references the RGB values in the palette instead of a different RGB value per pixel.
In love.load(), change
pixels[y][x] = {love.math.random(),love.math.random(),love.math.random()}
to
pixels[y][x] = math.floor(love.math.random() * (table.maxn(palette) - 1) + 1)
math.random() generates a decimal value from 0 to 1, and table.maxn() gives
the maximum index of the palette table (36 because there are 36 palette
entries). We want a random value from 1 to 36, so we can multiply the random
number by 35 to get a number from 0 to 35, then add 1.
There’s one more issue, which is that LÖVE expects RGB values to be decimals
from 0 to 1, but the palette table has whole numbers from 0-255. Add one more
chunk of code to love.load() to convert our palette values to the correct
range.
for i, v in ipairs(palette) do
    palette[i] = {v[1]/255, v[2]/255, v[3]/255}
end
This is a different form of a for loop. Inside this for loop, i refers to
the current index out of all of the indices in palette, and v refers to the
current value.
Drawing with the palette#
Now we need to draw pixels by looking up their color from the palette. Replace
the drawing code inside the loops in love.draw() with:
color = pixels[y][x]
love.graphics.setColor(palette[color][1], palette[color][2], palette[color][3], 1)
love.graphics.rectangle('fill', (x-1) * PWIDTH, (y-1) * PHEIGHT, PWIDTH, PHEIGHT)
This is almost the same as before, but with a level of indirection to look up the RGB value from the palette.
Result#
Complete code
WIDTH = 100
HEIGHT = 100
PWIDTH = love.graphics.getWidth() / WIDTH
PHEIGHT = love.graphics.getHeight() / HEIGHT
pixels = {}

palette = {
    {7,7,7},
    {28,8,8},
    {43,17,9},
    {65,19,11},
    {80,28,13},
    {95,36,16},
    {110,38,18},
    {133,47,22},
    {148,55,25},
    {163,70,30},
    {178,79,33},
    {185,80,34},
    {208,89,39},
    {208,96,40},
    {208,96,40},
    {201,102,41},
    {202,109,45},
    {195,115,45},
    {196,123,47},
    {197,130,49},
    {198,138,53},
    {190,137,53},
    {191,145,54},
    {192,152,60},
    {186,160,61},
    {186,160,61},
    {187,167,67},
    {187,167,67},
    {189,175,73},
    {182,175,72},
    {183,182,74},
    {183,182,79},
    {207,206,124},
    {223,223,166},
    {239,239,203},
    {255,255,255}
}

function love.load()
    for y = 0, HEIGHT do
        pixels[y] = {}
        for x = 0, WIDTH do
            pixels[y][x] = math.floor(love.math.random() * (table.maxn(palette) - 1) + 1)
        end
    end

    for i, v in ipairs(palette) do
        -- convert palette from "bytes" to floats
        palette[i] = {v[1]/255, v[2]/255, v[3]/255}
    end
end

function love.draw()
    for y = 1, HEIGHT do
        for x = 1, WIDTH do
            color = pixels[y][x]
            love.graphics.setColor(palette[color][1], palette[color][2], palette[color][3], 1)
            love.graphics.rectangle('fill', (x-1) * PWIDTH, (y-1) * PHEIGHT, PWIDTH, PHEIGHT)
        end
    end
end

function love.update(dt)
end
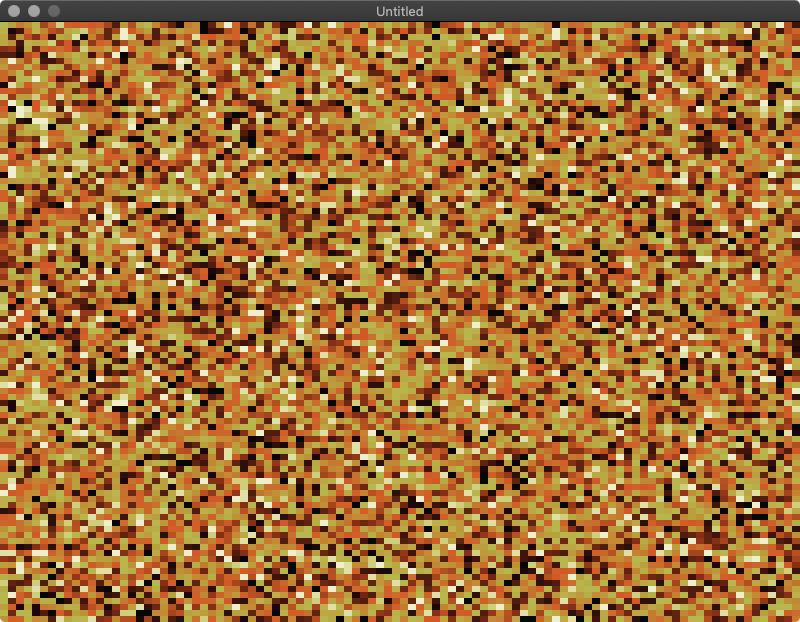
With these changes we get similar random noise, but with colors selected from our black-red-white palette.
Basic fire#
Alright, enough with the random noise. Let’s do something that looks more like fire.
Starting state#
First, let’s correct the starting state of our pixels. The screen needs to start all black, except for one white line at the bottom. That white line will serve as the generator of the fire.
In love.load() change
pixels[y][x] = math.floor(love.math.random() * (table.maxn(palette) - 1) + 1)
to the simpler
pixels[y][x] = 1
This sets all pixels to the first value of our palette, black.
Then add this chunk of code to the bottom of love.load():
for x = 1, WIDTH do
    pixels[HEIGHT][x] = table.maxn(palette)
end
This sets the last (bottom) line of pixels to white, the last value of our palette.
Propagate fire#
Now we can implement the doFire() and spreadFire() methods that Fabien
described in his blog.
doFire() is simple. It just iterates over every pixel, except for the top
line, and runs spreadFire() on that pixel.
function doFire()
    for y = 2, HEIGHT do
        for x = 1, WIDTH do
            spreadFire(x, y)
        end
    end
end
spreadFire() is also surprisingly simple. It just propagates the current pixel
up to the pixel above it, subtracting one from the palette index so that the new
pixel moves one step along the palette.
function spreadFire(x,y)
    pixels[y-1][x] = math.max(1, pixels[y][x] - 1)
end
Then just call doFire() from love.update(). This will update the state of
the fire on every frame.
function love.update(dt)
    doFire()
end
Result#
Complete code
WIDTH = 100
HEIGHT = 100
PWIDTH = love.graphics.getWidth() / WIDTH
PHEIGHT = love.graphics.getHeight() / HEIGHT
pixels = {}

palette = {
    {7,7,7},
    {28,8,8},
    {43,17,9},
    {65,19,11},
    {80,28,13},
    {95,36,16},
    {110,38,18},
    {133,47,22},
    {148,55,25},
    {163,70,30},
    {178,79,33},
    {185,80,34},
    {208,89,39},
    {208,96,40},
    {208,96,40},
    {201,102,41},
    {202,109,45},
    {195,115,45},
    {196,123,47},
    {197,130,49},
    {198,138,53},
    {190,137,53},
    {191,145,54},
    {192,152,60},
    {186,160,61},
    {186,160,61},
    {187,167,67},
    {187,167,67},
    {189,175,73},
    {182,175,72},
    {183,182,74},
    {183,182,79},
    {207,206,124},
    {223,223,166},
    {239,239,203},
    {255,255,255}
}

function love.load()
    for y = 1, HEIGHT do
        pixels[y] = {}
        for x = 1, WIDTH do
            -- init screen to black
            pixels[y][x] = 1
        end
    end

    for x = 1, WIDTH do
        -- bottom pixels start at white
        pixels[HEIGHT][x] = table.maxn(palette)
    end

    for i, v in ipairs(palette) do
        -- convert palette from "bytes" to floats
        palette[i] = {v[1]/255, v[2]/255, v[3]/255}
    end
end

function love.draw()
    for y = 1, HEIGHT do
        for x = 1, WIDTH do
            color = pixels[y][x]
            love.graphics.setColor(palette[color][1], palette[color][2], palette[color][3], 1)
            love.graphics.rectangle('fill', (x-1) * PWIDTH, (y-1) * PHEIGHT - 1, PWIDTH, PHEIGHT)
        end
    end
end

function doFire()
    for y = 2, HEIGHT do
        for x = 1, WIDTH do
            spreadFire(x, y)
        end
    end
end

function spreadFire(x,y)
    pixels[y-1][x] = math.max(1, pixels[y][x] - 1)
end

function love.update(dt)
    doFire()
end
This gives us a nice, though static, gradient along our palette.

Simple randomness#
A perfect static fire is boring, so let’s add some randomness. We’ll start out by just adding randomness along the Y-axis.
Modify spreadFire():
function spreadFire(x,y)
    rand = math.floor(math.random() + 0.5)
    pixels[y-1][x] = math.max(1, pixels[y][x] - rand)
end
First this code randomly gets either 0 or 1. Adding 0.5 and then flooring the number effectively rounds it to the nearest whole number, since Lua doesn’t have a built-in function to round numbers.
Then spreadFire() subtracts this random 0 or 1 from the pixel value, using
math.max() to ensure it never goes below the minimum valid color index of 1.
Result#
Complete code
WIDTH = 100
HEIGHT = 100
PWIDTH = love.graphics.getWidth() / WIDTH
PHEIGHT = love.graphics.getHeight() / HEIGHT
pixels = {}

palette = {
    {7,7,7},
    {28,8,8},
    {43,17,9},
    {65,19,11},
    {80,28,13},
    {95,36,16},
    {110,38,18},
    {133,47,22},
    {148,55,25},
    {163,70,30},
    {178,79,33},
    {185,80,34},
    {208,89,39},
    {208,96,40},
    {208,96,40},
    {201,102,41},
    {202,109,45},
    {195,115,45},
    {196,123,47},
    {197,130,49},
    {198,138,53},
    {190,137,53},
    {191,145,54},
    {192,152,60},
    {186,160,61},
    {186,160,61},
    {187,167,67},
    {187,167,67},
    {189,175,73},
    {182,175,72},
    {183,182,74},
    {183,182,79},
    {207,206,124},
    {223,223,166},
    {239,239,203},
    {255,255,255}
}

function love.load()
    for y = 1, HEIGHT do
        pixels[y] = {}
        for x = 1, WIDTH do
            -- init screen to black
            pixels[y][x] = 1
        end
    end

    for x = 1, WIDTH do
        -- bottom pixels start at white
        pixels[HEIGHT][x] = table.maxn(palette)
    end

    for i, v in ipairs(palette) do
        -- convert palette from "bytes" to floats
        palette[i] = {v[1]/255, v[2]/255, v[3]/255}
    end
end

function love.draw()
    for y = 1, HEIGHT do
        for x = 1, WIDTH do
            color = pixels[y][x]
            love.graphics.setColor(palette[color][1], palette[color][2], palette[color][3], 1)
            love.graphics.rectangle('fill', (x-1) * PWIDTH, (y-1) * PHEIGHT - 1, PWIDTH, PHEIGHT)
        end
    end
end

function doFire()
    for y = 2, HEIGHT do
        for x = 1, WIDTH do
            spreadFire(x, y)
        end
    end
end

function spreadFire(x,y)
    rand = math.floor(math.random() + 0.5)
    pixels[y-1][x] = math.max(1, pixels[y][x] - rand)
end

function love.update(dt)
    doFire()
end
This finally starts to look fire-like.
Better randomness#
With a small change to spreadFire() we can make the fire more realistic by
adding randomness along the X-axis.
First of all, we’re going to be doing bitwise operations, which Lua doesn’t
support natively. Pull in a library to do these operations by adding this line
to the very top of main.lua:
local bit = require("bit")
Now modify spreadFire():
function spreadFire(x,y)
    rand = math.floor(math.random() * 3 + 0.5)
    pixels[y-1][x - rand + 1] = math.max(1, pixels[y][x] - bit.band(1, rand))
end
This code now gets a random number from 0-3. It then randomly changes the destination X coordinate by -2 to +1 and sets the palette index to the value of the pixel below it minus a random value of 0 or 1. The 0 or 1 comes from performing a bitwise AND on the random 0-3 number to get the lowest bit.
Result#
Complete code
local bit = require("bit")

WIDTH = 100
HEIGHT = 100
PWIDTH = love.graphics.getWidth() / WIDTH
PHEIGHT = love.graphics.getHeight() / HEIGHT
pixels = {}

palette = {
    {7,7,7},
    {28,8,8},
    {43,17,9},
    {65,19,11},
    {80,28,13},
    {95,36,16},
    {110,38,18},
    {133,47,22},
    {148,55,25},
    {163,70,30},
    {178,79,33},
    {185,80,34},
    {208,89,39},
    {208,96,40},
    {208,96,40},
    {201,102,41},
    {202,109,45},
    {195,115,45},
    {196,123,47},
    {197,130,49},
    {198,138,53},
    {190,137,53},
    {191,145,54},
    {192,152,60},
    {186,160,61},
    {186,160,61},
    {187,167,67},
    {187,167,67},
    {189,175,73},
    {182,175,72},
    {183,182,74},
    {183,182,79},
    {207,206,124},
    {223,223,166},
    {239,239,203},
    {255,255,255}
}

function love.load()
    for y = 1, HEIGHT do
        pixels[y] = {}
        for x = 1, WIDTH do
            -- init screen to black
            pixels[y][x] = 1
        end
    end

    for x = 1, WIDTH do
        -- bottom pixels start at white
        pixels[HEIGHT][x] = table.maxn(palette)
    end

    for i, v in ipairs(palette) do
        -- convert palette from "bytes" to floats
        palette[i] = {v[1]/255, v[2]/255, v[3]/255}
    end
end

function love.draw()
    for y = 1, HEIGHT do
        for x = 1, WIDTH do
            color = pixels[y][x]
            love.graphics.setColor(palette[color][1], palette[color][2], palette[color][3], 1)
            love.graphics.rectangle('fill', (x-1) * PWIDTH, (y-1) * PHEIGHT - 1, PWIDTH, PHEIGHT)
        end
    end
end

function doFire()
    for y = 2, HEIGHT do
        for x = 1, WIDTH do
            spreadFire(x, y)
        end
    end
end

function spreadFire(x,y)
    rand = math.floor(math.random() * 3 + 0.5)
    pixels[y-1][x - rand + 1] = math.max(1, pixels[y][x] - bit.band(1, rand))
end

function love.update(dt)
    doFire()
end
Looks great! Here’s some nice pixelated fire, from only a small amount of lua.
Extra credit: Turning the fire on and off#
I mentioned earlier than the line of white pixels at the bottom of the window acts like the generator of the fire. So what happens if we turn off the generator?
Try setting the bottom line to black when you press the space bar.
function love.update(dt)
    if love.keyboard.isDown('space')
    then
        for x = 1, WIDTH do
            -- turn off generator line by setting it to black
            pixels[HEIGHT][x] = 1
        end
    else
        for x = 1, WIDTH do
            -- turn generator line back on
            pixels[HEIGHT][x] = table.maxn(palette)
        end
    end

    doFire()
end
Result#
Complete code
local bit = require("bit")

WIDTH = 100
HEIGHT = 100
PWIDTH = love.graphics.getWidth() / WIDTH
PHEIGHT = love.graphics.getHeight() / HEIGHT
pixels = {}

palette = {
    {7,7,7},
    {28,8,8},
    {43,17,9},
    {65,19,11},
    {80,28,13},
    {95,36,16},
    {110,38,18},
    {133,47,22},
    {148,55,25},
    {163,70,30},
    {178,79,33},
    {185,80,34},
    {208,89,39},
    {208,96,40},
    {208,96,40},
    {201,102,41},
    {202,109,45},
    {195,115,45},
    {196,123,47},
    {197,130,49},
    {198,138,53},
    {190,137,53},
    {191,145,54},
    {192,152,60},
    {186,160,61},
    {186,160,61},
    {187,167,67},
    {187,167,67},
    {189,175,73},
    {182,175,72},
    {183,182,74},
    {183,182,79},
    {207,206,124},
    {223,223,166},
    {239,239,203},
    {255,255,255}
}

function love.load()
    for y = 1, HEIGHT do
        pixels[y] = {}
        for x = 1, WIDTH do
            -- init screen to black
            pixels[y][x] = 1
        end
    end

    for x = 1, WIDTH do
        -- bottom pixels start at white
        pixels[HEIGHT][x] = table.maxn(palette)
    end

    for i, v in ipairs(palette) do
        -- convert palette from "bytes" to floats
        palette[i] = {v[1]/255, v[2]/255, v[3]/255}
    end
end

function love.draw()
    for y = 1, HEIGHT do
        for x = 1, WIDTH do
            color = pixels[y][x]
            love.graphics.setColor(palette[color][1], palette[color][2], palette[color][3], 1)
            love.graphics.rectangle('fill', (x-1) * PWIDTH, (y-1) * PHEIGHT - 1, PWIDTH, PHEIGHT)
        end
    end
end

function doFire()
    for y = 2, HEIGHT do
        for x = 1, WIDTH do
            spreadFire(x, y)
        end
    end
end

function spreadFire(x,y)
    rand = math.floor(math.random() * 3 + 0.5)
    pixels[y-1][x - rand + 1] = math.max(1, pixels[y][x] - bit.band(1, rand))
end

function love.update(dt)
    if love.keyboard.isDown('space')
    then
        for x = 1, WIDTH do
            -- turn off generator line
            pixels[HEIGHT][x] = 1
        end
    else
        for x = 1, WIDTH do
            -- turn generator line back on
            pixels[HEIGHT][x] = table.maxn(palette)
        end
    end

    doFire()
end
Pixely but realistic looking fire that can turn on and off at the press of a button!
Exercises for the reader#
Here are a couple of interesting tweaks you can try to implement to check your understanding of the code. See if you can complete each one by changing only a single line of code.
- Try changing the fire color to green or blue
- Try making the fire shorter
Thanks to Jackie Loven for editing.